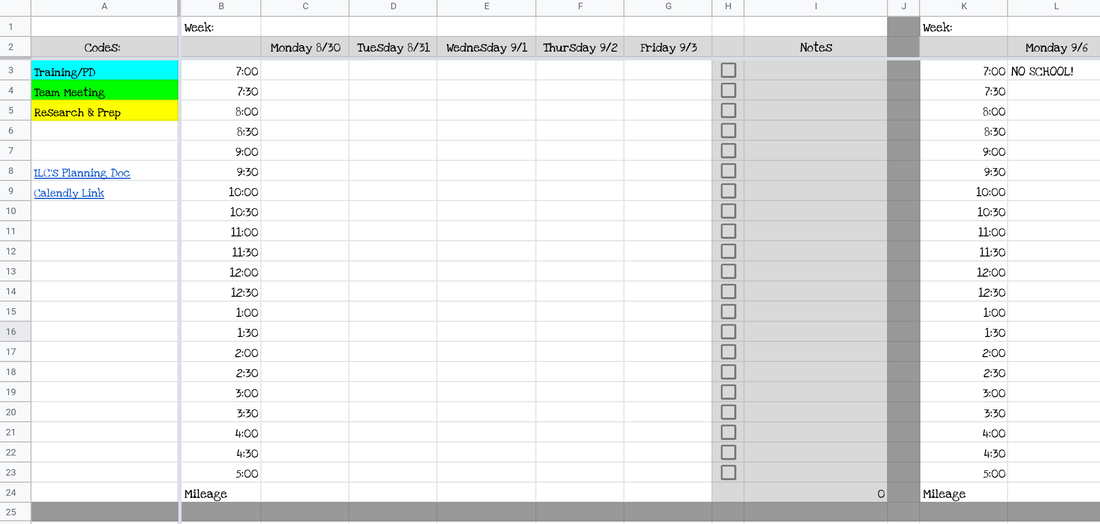
New Template!Since 2016, I've been using this tracker to manage my work life, so I figured I'd share the newest template for anyone else who might need it. It's gone through many updates over the years but that's the benefit of a template... you can make it what you want! Feel free to make your own copy below. Previous Tracker posts
Using this Template for a New JobSince I was required to have some type of tracker in previous years, the categories weren't my decision. This year I am using it to keep myself organized and help with project management. This screenshot shows only a few categories on the left for now. I'll add as I go. I find it really helpful to link things to this one document instead of searching my drive or email for links when I'm ready to start working on them. The best part is, I can share it with my personal Google account and get to it on the go as well. If you use this template, I'd love to hear what works for you in the comments below or on social media! Back to School Conference!Before I go, I have to share a PD opportunity coming up in September. It's FREE!
Join Kasey Bell's Team (including me) and other awesome educators for this FREE event! To sign up, you'll need a Teachable account (also FREE) and sign up by clicking the button below. We hope to see you there!
0 Comments
My favorite thing to do for a new school year is buy a new planner. I've been in love with my Passion Planner for the last few years, but I really wanted to try a disc planner so I could have some flexibility with what I can add to it. During state testing last school year, I decided to get creative (during my "no tech allowed" hall monitoring time) and try combining my Passion Planner with a Happy Planner system. The reason for this was because I love the organization of a Passion Planner, but can't flip it backwards or add anything to it. The Happy Planner has the flexibility I want, but not the organization. Since I had already purchased a new Passion Planner, I decided it was also worth buying a Happy Planner for my experiment. I love how it turned out, so I had to share! Warning... It took me a little time to do this, but the end product was worth it to me and will serve me well for many school years to come! Step 1: Purchase an undated Passion Planner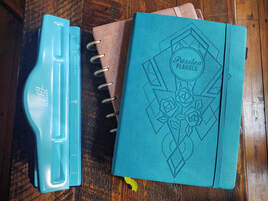 If you don't already have a Passion Planner, you can get a printable format and print your own. This may be a more cost effective way to do it if there aren't any sales going on at the moment. It can be a little tricky printing all the pages and getting the front/back order the way you want, so I found it easier to just take an undated medium planner apart and use the beautiful cover too. This planner has monthly spreads in front and weekly in the back, so this also made it easier to organize. Step 2: Purchase a Happy Planner with tabs and discs you love
Step 3: Take it apart and punch it... I know, it's scary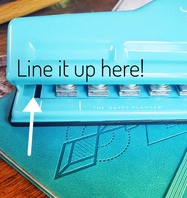 I started with the cover and pulled it off carefully. I had to cut the spine off later and carefully notch out the edges since the cover is too thick to fit in the Happy Planner hole punch. This is the part that is the most tedious. Just remember, once you do this, you'll be able to refill this planner as many times as you want. To pull the pages apart, I opened to the center and pulled them out by snipping the string binding in the middle as I went. Then I layed them down face down as I went to keep them in order. To make clean edges once it was time to cut them, I used a paper cutter down the center of the two page spreads so it would look nice and neat when I used the hole punch later. When it was time to punch out the pages, I lined them up with the center mark to stay consistent. You can also use the gap between the hinges as a guide since the lines on the hole punch are shorter than the Passion Planner pages (about 1/4 of an inch on each side). This part does take some time, so turn on something binge worthy and have fun! Step 4: Lay it out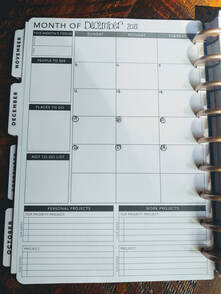 I seperated the monthly pages from the weekly pages so I could do my monthly tabs first. Since I wouldn't need the reflection part printed on the back of the monthly pages, I added tape to the back and attached it to the tabbed pages so it would open right to the calendar. I used tape so I could pull it off easily when I want to use my planner again next school year. You can see the sections that overlap in this picture - it's not too bad since I like the Passion Planner layout better than the one in the Happy Planner. As long as you center the pages on the hole punch, you won't notice any overlap when it's closed since the Passion Planner cover hides any size differences. 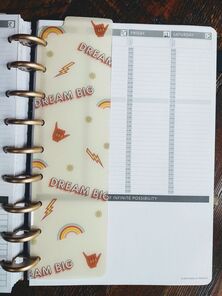 The weekly section is easy! You just add them behind the monthly sections, then use a page marker (these are my favorite) for the week you are on. If you print your own or take apart a dated Passion Planner, you may be able to keep it within each monthly section. I do more planning on my weekly sections, so it doesn't bother me to have them in different sections of my planner. One of my favorite parts of my Passion Planner are the dot pages, so I put those behind the weekly spreads and use another page marker for that section. This is my mini Bullet Journal! I use the first page for a "Table of Contents" then add to it as I go. If you are more of a video tutorial kind of person, there are some out there if you search YouTube. I wish I had thought about doing it as I went, but I wasn't sure how it was going to turn out.
If you hve any questions about the details, please reach out! Thanks for reading and I hope you enjoy the rest of your summer! ~Pam |
AuthorI'm an Innovative Learning Coordinator in Berkeley County South Carolina and a Google Certified Trainer. Archives
April 2024
Short Cuts
All
|


 RSS Feed