Pam Hubler
  • Home
    • About Me
  • Blog
  • Hire Me

2025-2026 Planning Calendar for Coaches and Educators

5/5/2025

0 Comments


Planning Calendar for Coaches and Educators​

It’s been a while since my last post, and I sincerely apologize for my absence. Y'all know life in education can get busy, but I’m back, and I’m excited to share some valuable resources with you!

As we wrap up the 2024-2025 school year and gear up for 2025-2026, it’s essential to have a solid planning calendar in place. A well-structured calendar helps coaches and educators stay organized, set attainable goals, and maximize student engagement throughout the year.
​

What's New This Year? 

This year, I’ve included some FREE fresh templates that you can customize to fit your needs. Check them out below!
  • Monthly Overview Template: Perfect for outlining key events, deadlines, and initiatives for the entire year! My team still uses this calendar for EVERYTHING! It basically works as a digital planner for all of us. 
  • Weekly Planning Template: Helps you break down your goals into manageable weekly tasks. I plan out all my school visits and projects using this sheet. If I have a to-do list, it's on here as well, including links to the documents and projects I'm working on. Each tab has the entire month displayed horizontally so you can scroll through everything for the month on one tab. ​
Monthly Calendar
Picture
Weekly Planner
Picture

Tips for Effective Planning

  1. Set Clear Goals: Use your templates to outline specific, measurable goals for the year.
  2. Stay Flexible: Remember that plans may change, and being adaptable is key to success.
  3. Collaborate: Engage with colleagues to share ideas and resources that can enhance your planning.
​
Picture
I hope this updated planning calendar and the new templates offer you a solid foundation for the upcoming school year. Let’s make 2025-2026 our best school year yet!
I have an extra sheet layout for reflections (using the SWOT strategy) and PD tracking if you're interested. Just fill out this form and I'll send you an updated link that includes that page. 
I hope y'all finish out your year well and have a wonderful summer! Please reach out on your favorite social media platform if you have any template requests or ideas for a new blog post. 🤩Pam 

0 Comments

Daily Tracker 2022-2023

8/2/2022

0 Comments


Daily Tracker 22-23 Update!

I've had some requests for the latest version of my daily tracker, so here's the updated version for 22-23!  Click the image below for the template link so you'll have your own copy. If you want to read the original post, click the button below the image. Enjoy! 
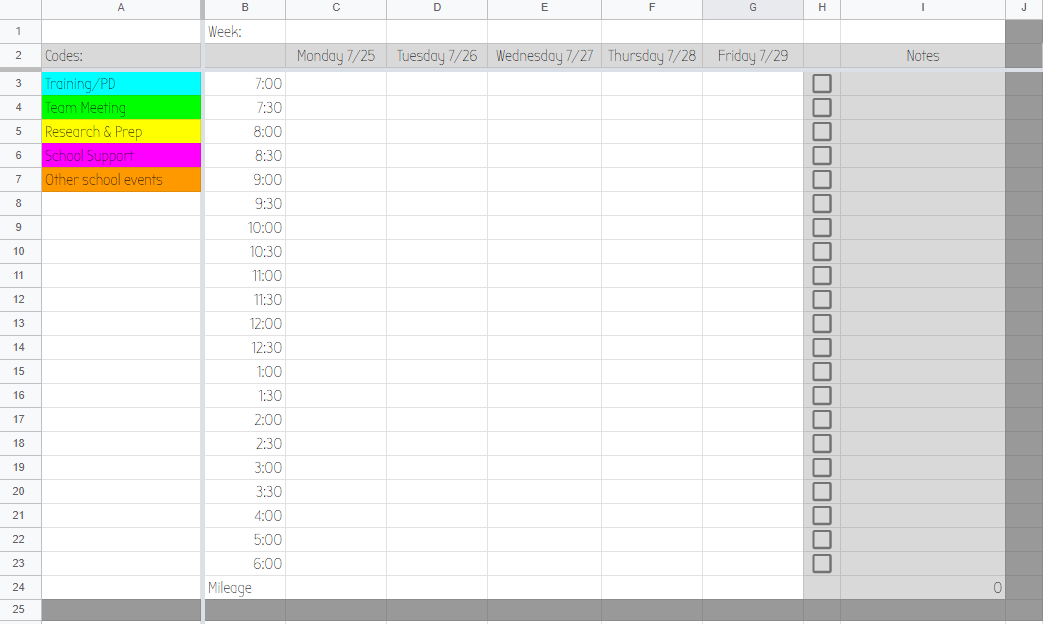
Picture
Original Post
0 Comments

New Year- New Planner!

7/17/2021

0 Comments

 
My favorite thing to do for a new school year is buy a new planner. I've been in love with my Passion Planner for the last few years, but I really wanted to try a disc planner so I could have some flexibility with what I can add to it. During state testing last school year, I decided to get creative (during my "no tech allowed" hall monitoring time) and try combining my Passion Planner with a Happy Planner system. The reason for this was because I love the organization of a Passion Planner, but can't flip it backwards or add anything to it. The Happy Planner has the flexibility I want, but not the organization.  Since I had already purchased a new Passion Planner, I decided it was also worth buying a Happy Planner for my experiment. I love how it turned out, so I had to share!
Warning... It took me a little time to do this, but the end product was worth it to me and will serve me well for many school years to come! 
​

Step 1: Purchase an undated Passion Planner

Picture
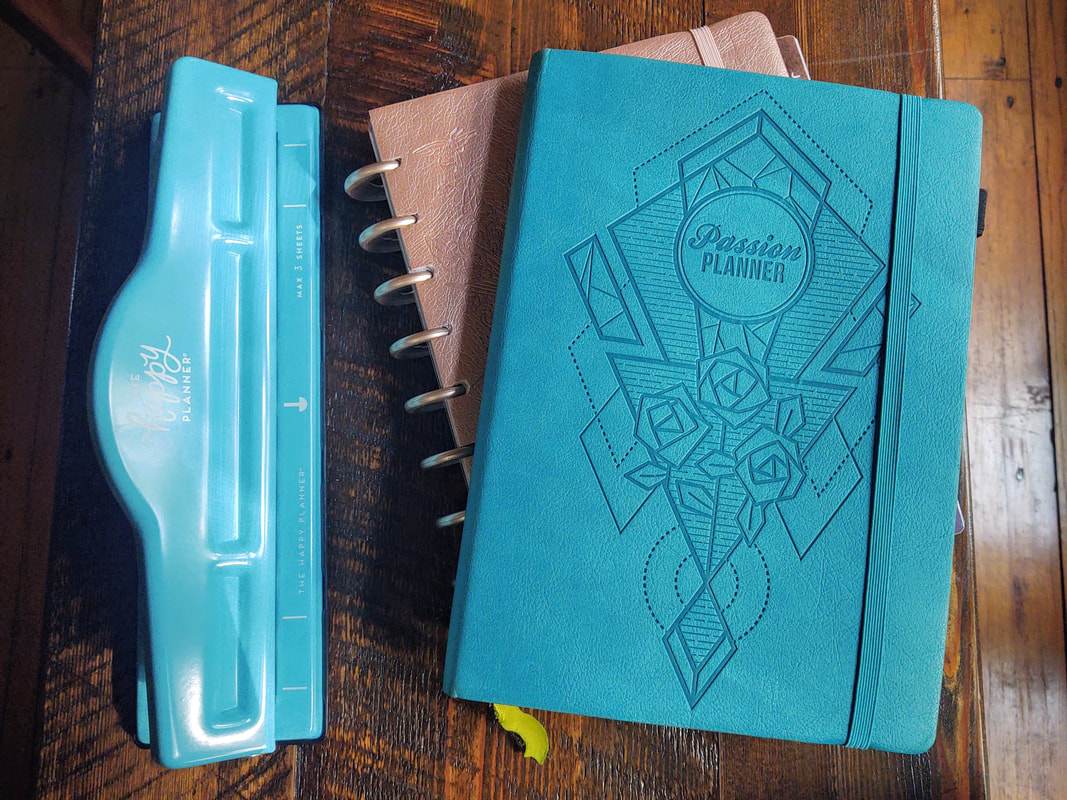
If you don't already have a Passion Planner, you can get a printable format and print your own. This may be a more cost effective way to do it if there aren't any sales going on at the moment. It can be a little tricky printing all the pages and getting the front/back order the way you want, so I found it easier to just take an undated medium planner apart and use the beautiful cover too.  This planner has  monthly spreads in  front and weekly in the back, so this also made it easier to organize. 

Step 2: Purchase a Happy Planner with tabs and discs you love

Picture
I found a Happy Planner that had the theme I wanted since the cover wasn't going to matter (go to Michaels for this so you can use your teacher discount!). 
​My medium Passion Planner pages are a bit longer than the Happy Planner pages, but they fit well within the tabs, so I am okay with the tiny bit of over lap you can see. If I added the pages and kept the Happy Planner cover, the pages would stick out just a tad (and would drive me nuts). This is why I chose to add my Passion Planner cover onto the Happy Planner cover with spray adhesive.  After doing this, I also realized I can reuse the same cover, tabs, and discs over and over again (which made it worth my time)!  
​

Step 3: Take it apart and punch it... I know, it's scary 

Picture
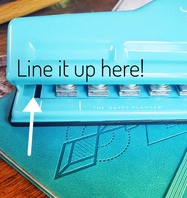
I started with the cover and pulled it off carefully. I had to cut the spine off later and carefully notch out the edges since the cover is too thick to fit in the Happy Planner hole punch. This is the part that is the most tedious. Just remember, once you do this, you'll be able to refill this planner as many times as you want. 

To pull the pages apart, I opened to the center and pulled them out by snipping the string binding in the middle as I went.  Then I layed them down face down as I went to keep them in order.   To make clean edges once it was time to cut them, I used a paper cutter down the center of the two page spreads so it would look nice and neat when I used the hole punch later. 

When it was time to punch out the pages, I lined them up with the center mark to stay consistent. You can also use the gap between the hinges as a guide since the lines on the hole punch are shorter than the Passion Planner pages (about 1/4 of an inch on each side). This part does take some time, so turn on something binge worthy and have fun!​

Step 4: Lay it out  

Picture
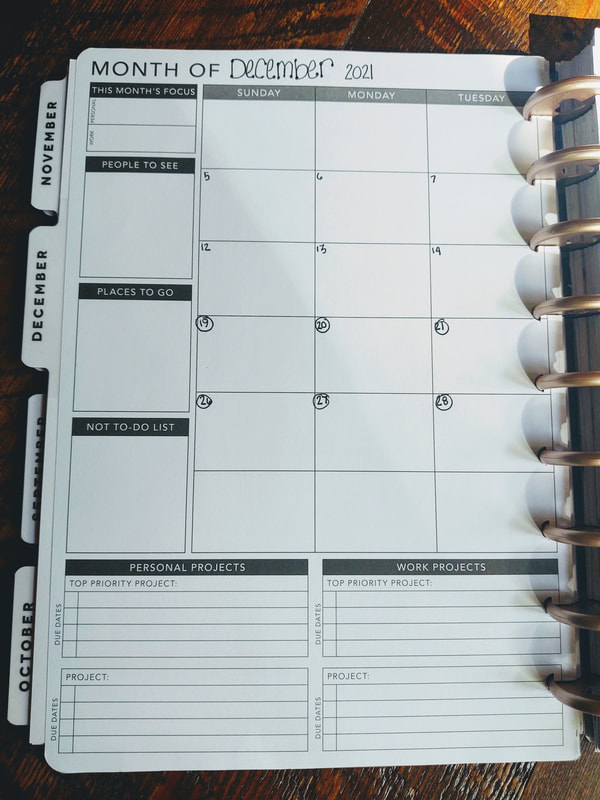
I seperated the monthly pages from the weekly pages so I could do my monthly tabs first. Since I wouldn't need  the reflection part printed on the back of the monthly pages, I added tape to the back and attached it to the tabbed pages so it would open right to the calendar. I used tape so I could pull it off easily when I want to use my planner again next school year. You can see the sections that overlap in this picture - it's not too bad since I like the Passion Planner layout better than the one in the Happy Planner.  As long as you center the pages on the hole punch, you won't notice any overlap when it's closed since the Passion Planner cover hides any size differences.   

Picture
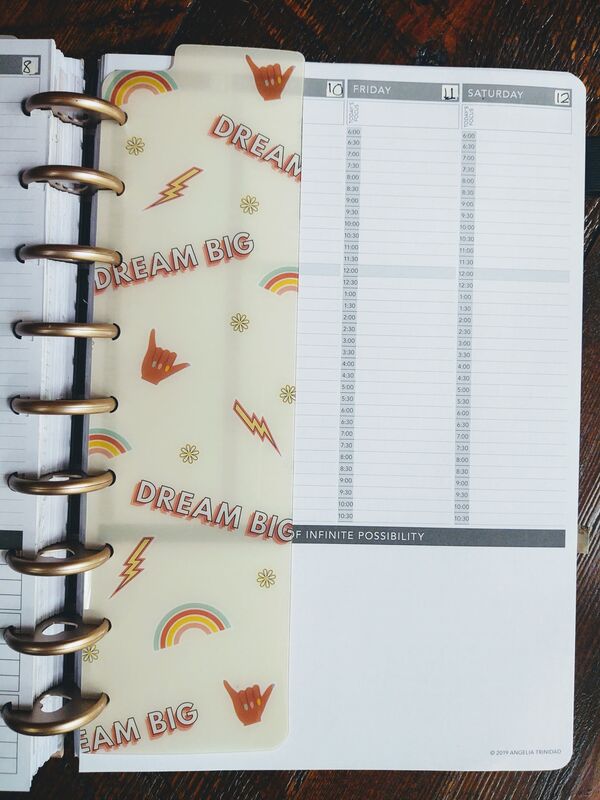
The weekly section is easy! You just add them behind the monthly sections, then use a page marker (these are my favorite) for the week you are on. If you print your own or take apart a dated Passion Planner, you may be able to keep it within each monthly section. I do more planning on my weekly sections, so it doesn't bother me to have them in different sections of my planner.  
One of my favorite parts of my Passion Planner are the dot pages, so I put those behind the weekly spreads and use another page marker for that section. This is my mini Bullet Journal! I use the first page for a "Table of Contents" then add to it as I go. 

If you are more of a video tutorial kind of person, there are some out there if you search YouTube. I wish I had thought about doing it as I went, but I wasn't sure how it was going to turn out. 
If you hve any questions about the details, please reach out! 

Thanks for reading and I hope you enjoy the rest of your summer! ~Pam 
0 Comments
    Picture

    Author

    I'm an Innovative Learning Coordinator in Berkeley County South Carolina and a Google Certified Trainer.  
    I have 27 years of experience teaching K-8 special ed., General Ed., and instructional & technology coaching. 
    ​Since I enjoy technology more than some, I started this blog for educators who love it too. Thanks for visiting! 

    Archives

    May 2025
    April 2024
    March 2024
    January 2024
    July 2023
    June 2023
    April 2023
    January 2023
    August 2022
    July 2022
    July 2021
    May 2021
    February 2021
    January 2021
    October 2020
    August 2020
    July 2020
    June 2020
    May 2020
    April 2020
    March 2020
    February 2020
    January 2020
    December 2019
    November 2019
    August 2019
    June 2019
    May 2019
    March 2019
    February 2019
    January 2019
    December 2018
    November 2018
    September 2018
    July 2018
    June 2018
    May 2018
    April 2018
    February 2018
    January 2018
    November 2017
    October 2017
    August 2017
    June 2017
    May 2017
    February 2017
    June 2016
    May 2016
    April 2016
    September 2015
    August 2015
    March 2015
    January 2015
    November 2014
    July 2014
    June 2014
    May 2014

    Short Cuts

    All
    Apps
    Back To School
    Bitmojis
    Blended Learning
    Blogging Buddies
    Blogs
    Books
    Choice Board
    Chrome
    Close Reading
    Coaching
    Conferences
    COVID-19
    Edcamp
    Edmodo
    Edtechteam
    #educoach
    End Of The Year
    E-Text
    FETC
    Google
    Google Calendar
    Google Certified Trainer
    Google Classroom
    Google Docs
    Google Drawings
    #GoogleET
    Google Forms
    Google Keep
    Google Sheets
    Google Slides
    GSuite
    #GSuiteEDU
    #GSuiteUDL
    HyperDocs
    ISTE
    Lesson Planning
    My One Word
    NotAtISTE
    Personalized Learning
    Planning
    PLC's
    PledgeCents
    PLN
    Podcasts
    #PottyPD
    Productivity
    Professional Development
    Remote Learning
    Sketchnoting
    Slides
    Social Media
    Summer
    Twitter
    UDL
    Videos
    Wakelet
    Websites

    RSS Feed

    Tweets by @specialtechie
Proudly powered by Weebly
Pam Hubler ~ Innovative Learning Coordinator, Office of Technology, Berkeley County School District ~ @specialtechie
  • Home
    • About Me
  • Blog
  • Hire Me